After a few years maintaining my mobiusikon website, I thought it was time to check in on my personal site to make sure it’s still working. I’ve gone from being a generalist designer (multimedia, video, web) to focusing mainly on UX/UI design. These days, I’m a Senior UX Developer and enjoying it quite a bit.
That said, I’ve had this itch to get back into 3D modeling and animation. I started playing around with Blender 3D, taking small steps toward becoming comfortable with it. Back in the day, my main tools were EIAS3D with FormZ, EIM, and Sculptris for modeling and animation. Later, Cinema 4D came into the mix since it made logo rendering and deformations easy to handle before bringing them into EIAS.
So why Blender now? Well, I’ve used EIAS for over 20 years, but it’s moved forward at a really slow pace. Development shows promise, but I need something modern. Cinema 4D and After Effects cover motion graphics nicely, but for a full end-to-end 3D workflow, they fall short. Tools like FormZ, Modo, Cinema 4D, and Sculptris are great for creating unique geometry, but Blender steps in where they can’t. I’ve been tracking its progress for about 6 months, and honestly, seeing Blender projects (even movies on Netflix) convinced me it was time to dive in.
The Blender community has been a huge help. Tutorials and resources are everywhere, and I’ve already noticed that versions 2.79 and 2.8 can compete with heavyweights like Maya, 3D Studio Max, EIAS, and Cinema 4D. I’m only in my third week, dedicating 1–2 hours a day, but I’ve already managed to model a Barcelona chair and explore basic techniques. Once I adjusted to the interface, the tools felt fast and surprisingly intuitive. At first, I believed the old myth that Blender’s UI was clunky—turns out all it took was a 15-minute overview and an hour-long deep dive to really “get” the Blender way. With version 2.8, it’s only getting better.
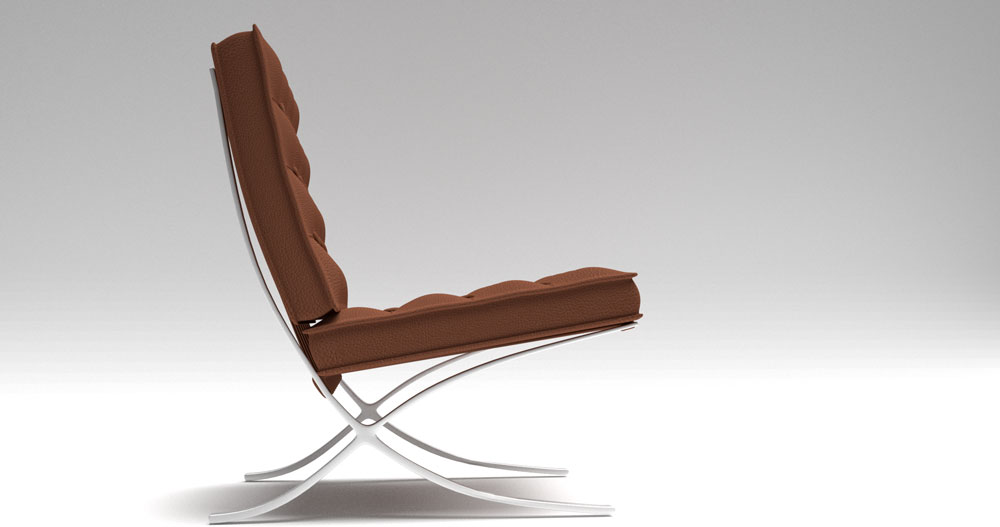
Here’s my first render of the Barcelona chair, thanks to a CG Masters tutorial. (tutorial link).
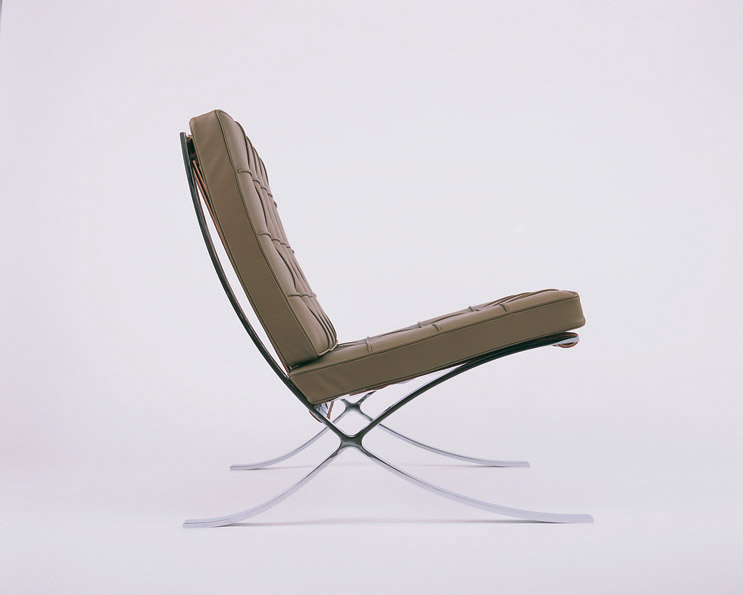
This is my reference file:
I tried to match the setup with more of a studio-style approach. The color gave me some trouble—I used an actual leather swatch from Knoll, the company that manufactures the Barcelona chair. The result was a rich brown that honestly made the chair look a bit like a chocolate bar. The tutorial version had cushions that acted as my reference, but they felt more like bubbles than real cushions. So I went back into the model, applied some of the new tools I’d learned, and spent time enhancing the lighting and texturing. After about 40 minutes of modeling (with a lot of trial and error, since I forgot to save my first attempt), I was able to experiment with lighting, texture mapping, and shortcuts that will definitely help in my workflow moving forward. I’m pretty happy with my modified version, and for now this wraps up the tutorial. Next, I’ll start working on the other pieces in the Barcelona set.
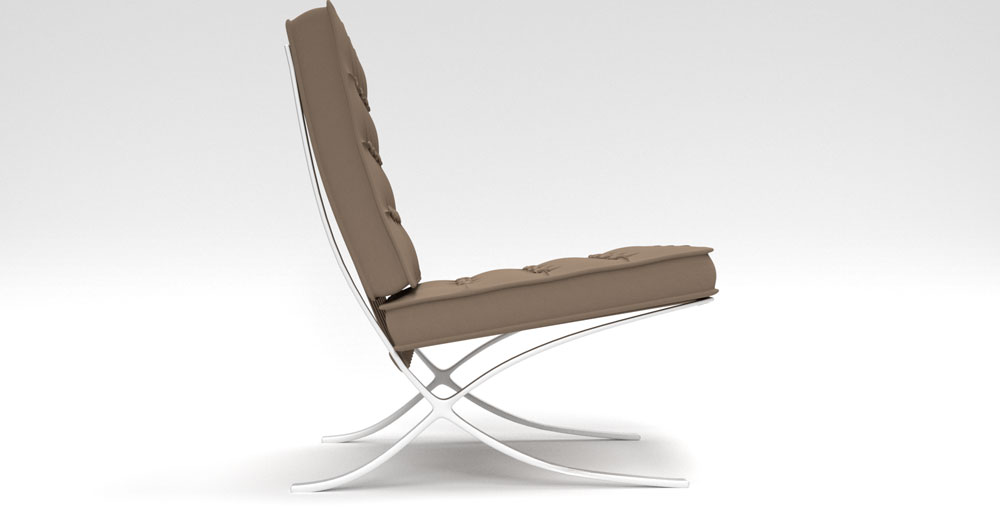
It’s still very much a work in progress. I need to refine the incline of the chair, since the tutorial’s cushions had a steep curve that I ended up flattening to better match the authentic design. I also need to adjust the tilt, which I’ll tackle in the next stage of the project. Even with these details left to fix, the process has been a lot of fun. I’m excited to continue exploring furniture and industrial design modeling as I move forward.

